This guide will take you through the steps of setting up DNS records for Office 365 within cPanel. Please note that you should replace “demoosite.com” with your own domain name when setting up your own records.
Step 1– Login to cPanel
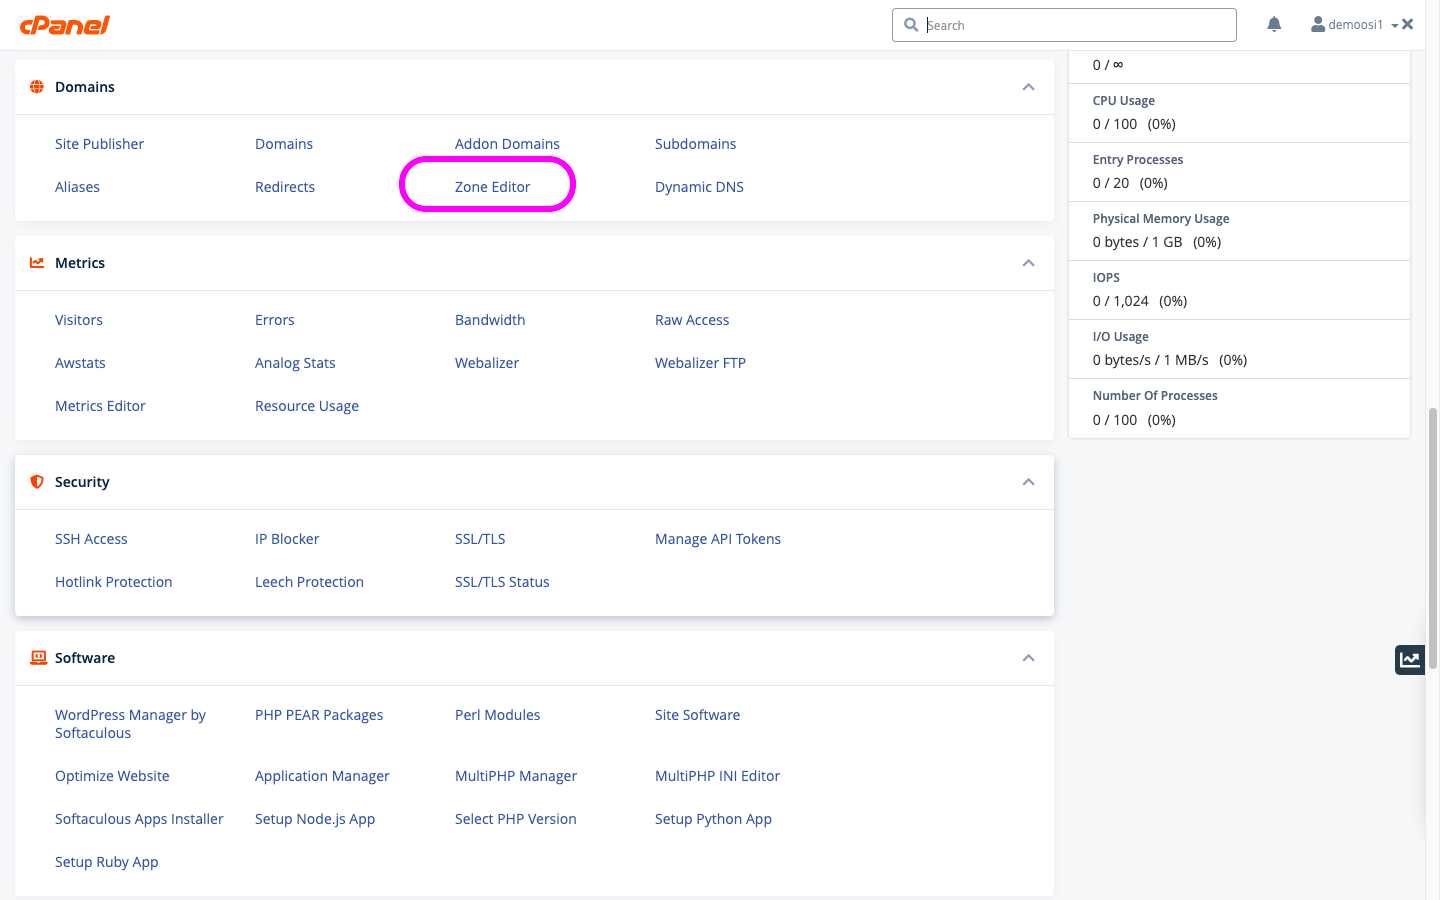
Step 2– Click on Zone Editor in your Domains section.
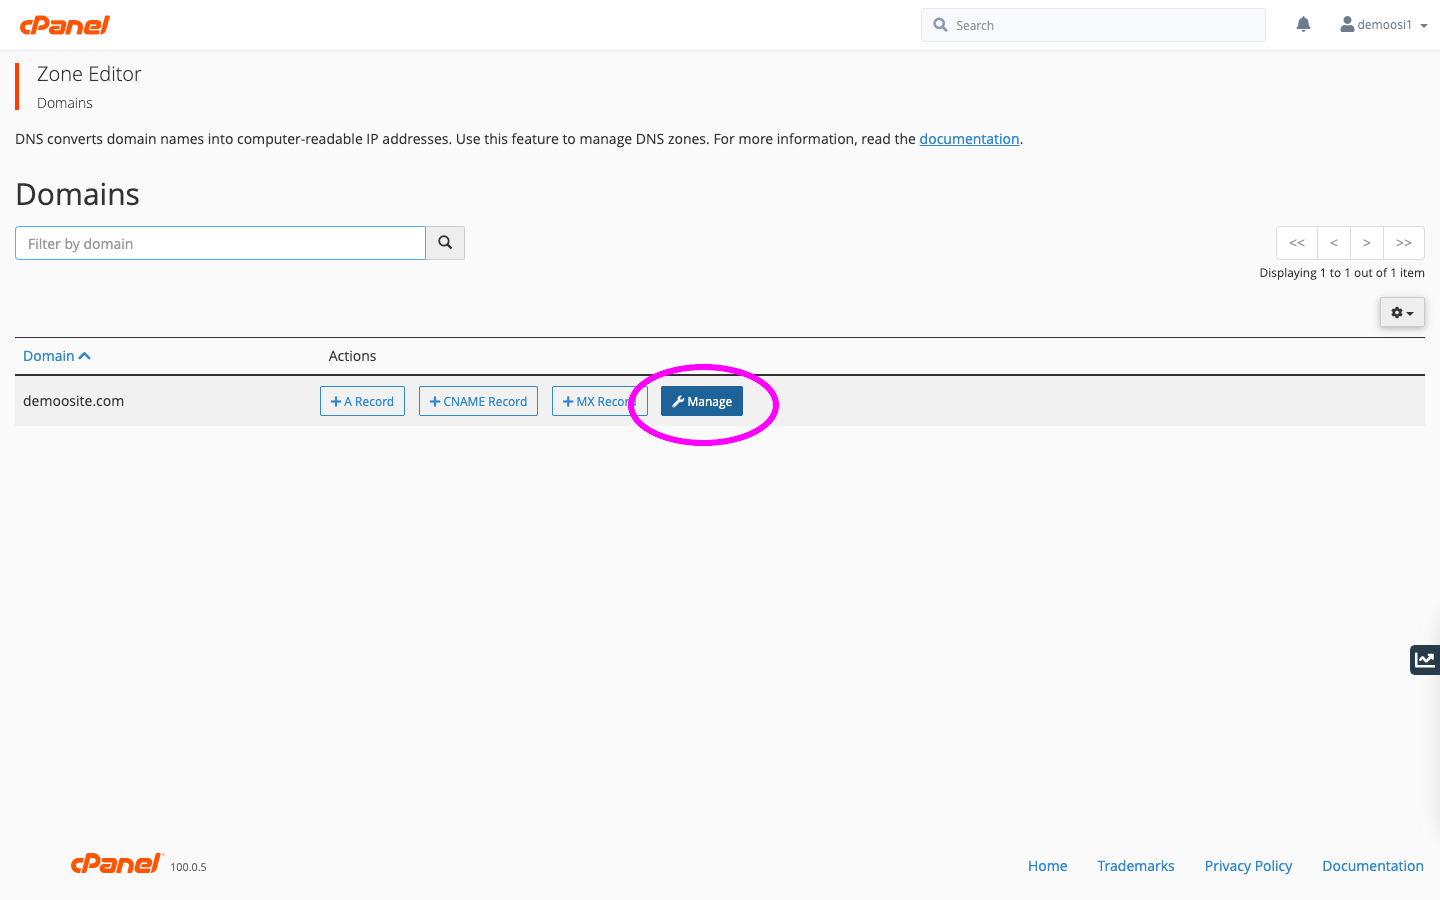
Step 3– Click on Manage for the relevant domain.
- To add a new record, select the record type via the drop-down menu and input the record’s name, TTL, and destination.
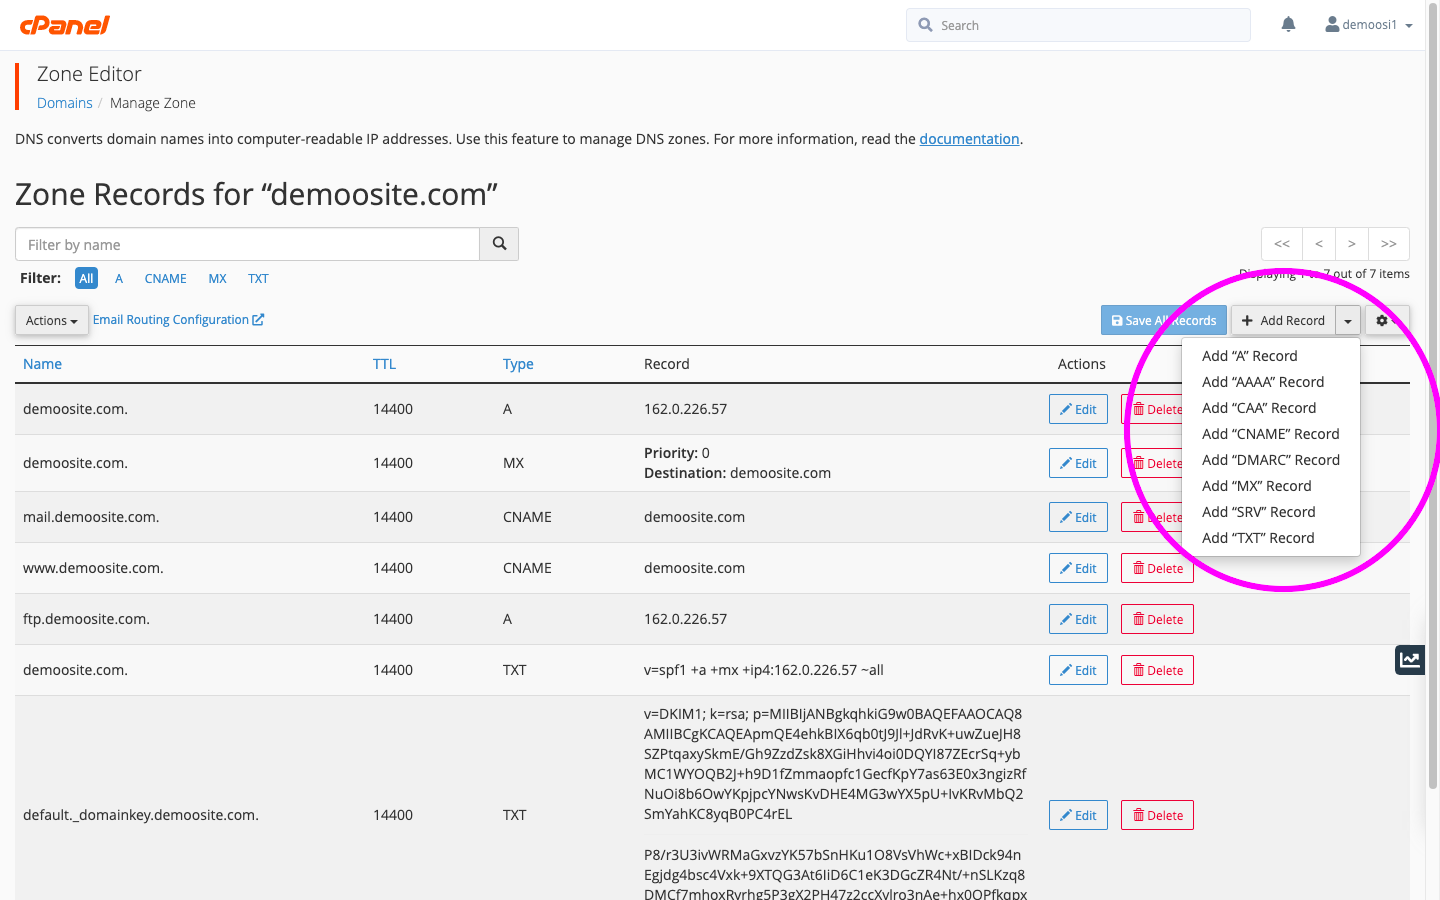
Step 4 – Configure DNS for Office 365
- To set up Microsoft Office 365 add/update the following DNS records for the domain(s) in question:
| # Record Type TXT | ||||||
| demoosite.com. | 3600 | TXT | MS=ms000000 | |||
| demoosite.com. | 3600 | TXT | “v=spf1 include:spf.protection.outlook.com -all” | |||
| # Record Type MX | ||||||
| demoosite.com. | 300 | MX | 0 | demoosite.com.mail.protection.outlook.com. | ||
| # Record Type CNAME | ||||||
| autodiscover | 3600 | CNAME | autodiscover.outlook.com. | |||
| sip | 3600 | CNAME | sipdir.online.lync.com. | |||
| lyncdiscover | 3600 | CNAME | webdir.online.lync.com. | |||
| msoid | 3600 | CNAME | clientconfig.microsoftonline-p.net. | |||
| enterpriseregistration | 3600 | CNAME | enterpriseregistration.windows.net. | |||
| enterpriseenrollment | 3600 | CNAME | enterpriseenrollment.manage.microsoft.com. | |||
| # Record type SRV | ||||||
| _sip._tls | 3600 | SRV | 100 | 1 | 443 | sipdir.online.lync.com. |
| _sipfederationtls._tcp | 3600 | SRV | 100 | 1 | 5061 | sipfed.online.lync.com. |
INFO: The MS record shown in red is a number supplied by Microsoft as part of the verification process. Please see Microsoft’s knowledge-base on how to retrieve this number by clicking here.
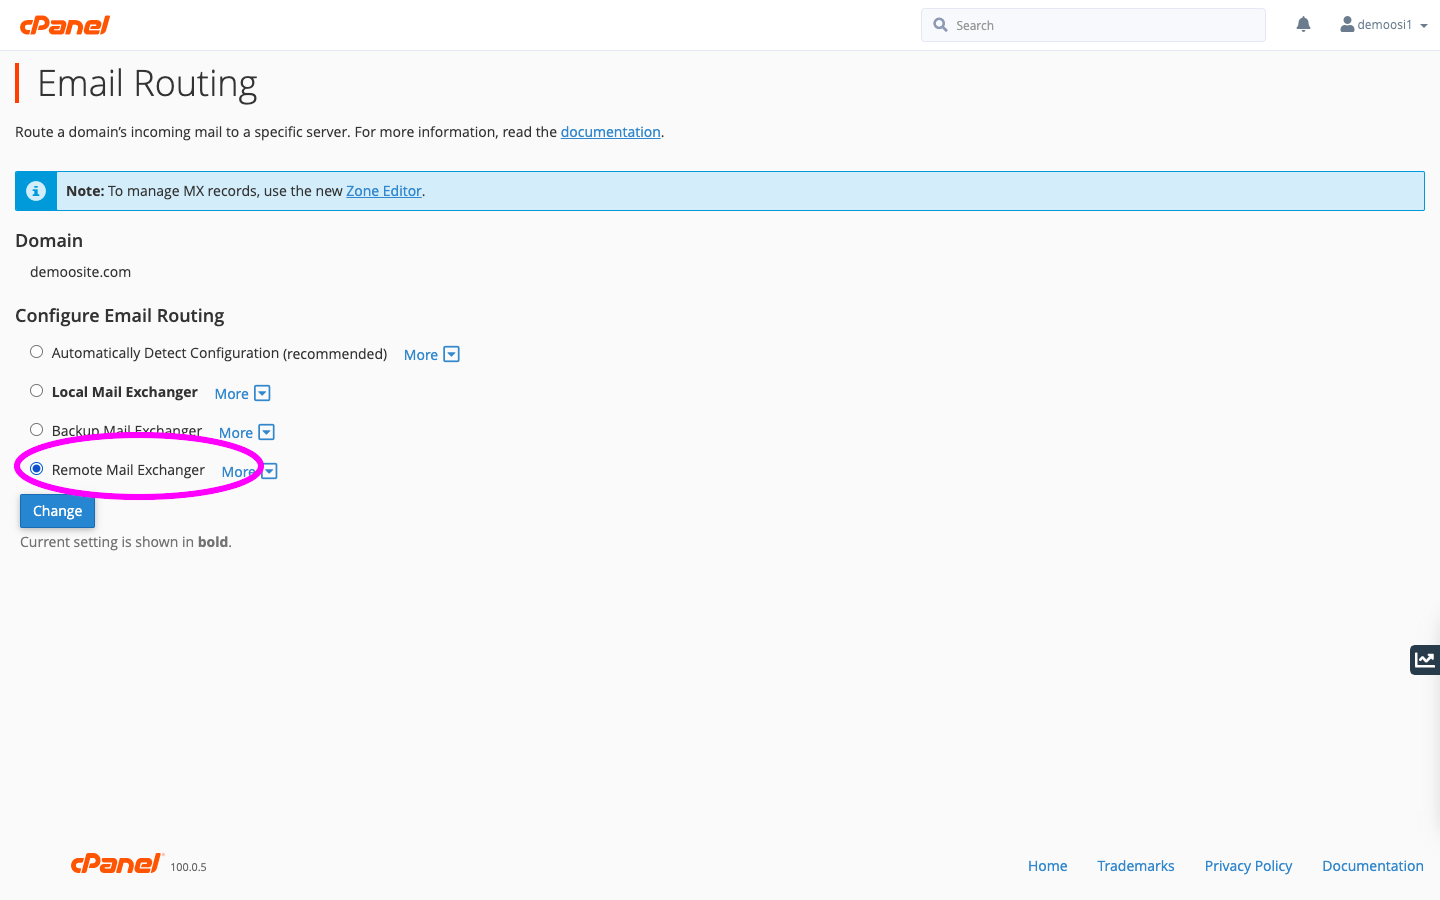
Step 5 – Change email routing to Remote
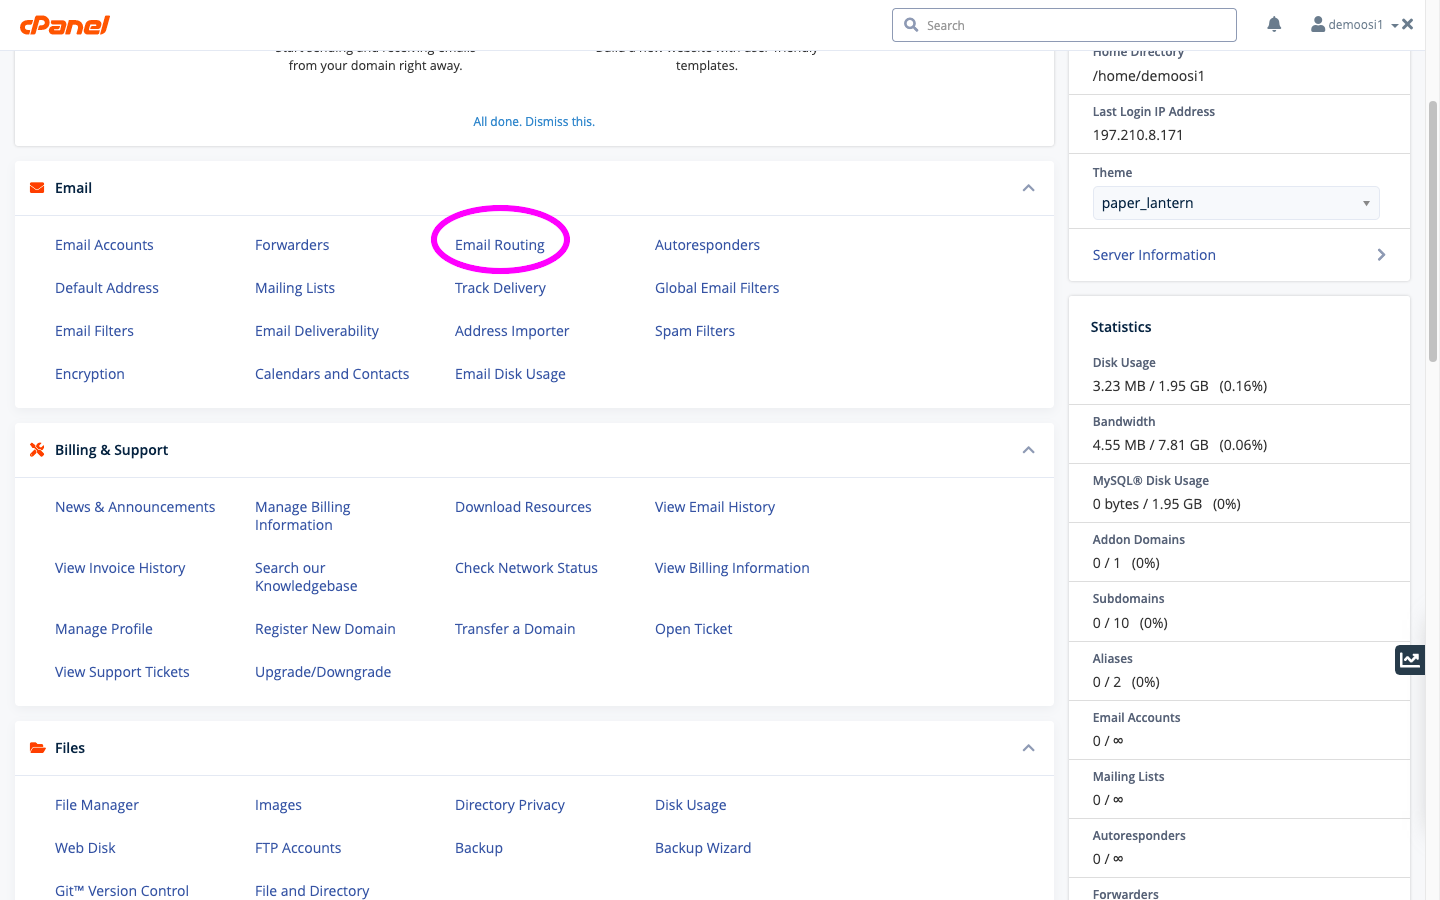
- Select your domain in the drop-down section, ensure that your routing is set to “Remote Mail Exchange” and click on “Change”.
That’s it! You’ve successfully added Office 365 records. Typically, it takes about 15 minutes for these changes to take effect. Since it needs to update across the Internet’s DNS system, it can take up to a few hours.
