There are a range of different WordPress form plugins out there such as WP Forms, Contact Form 7 and Pirate Forms.
In this example, we'll demonstrate with the free to use Contact Form 7 plugin.
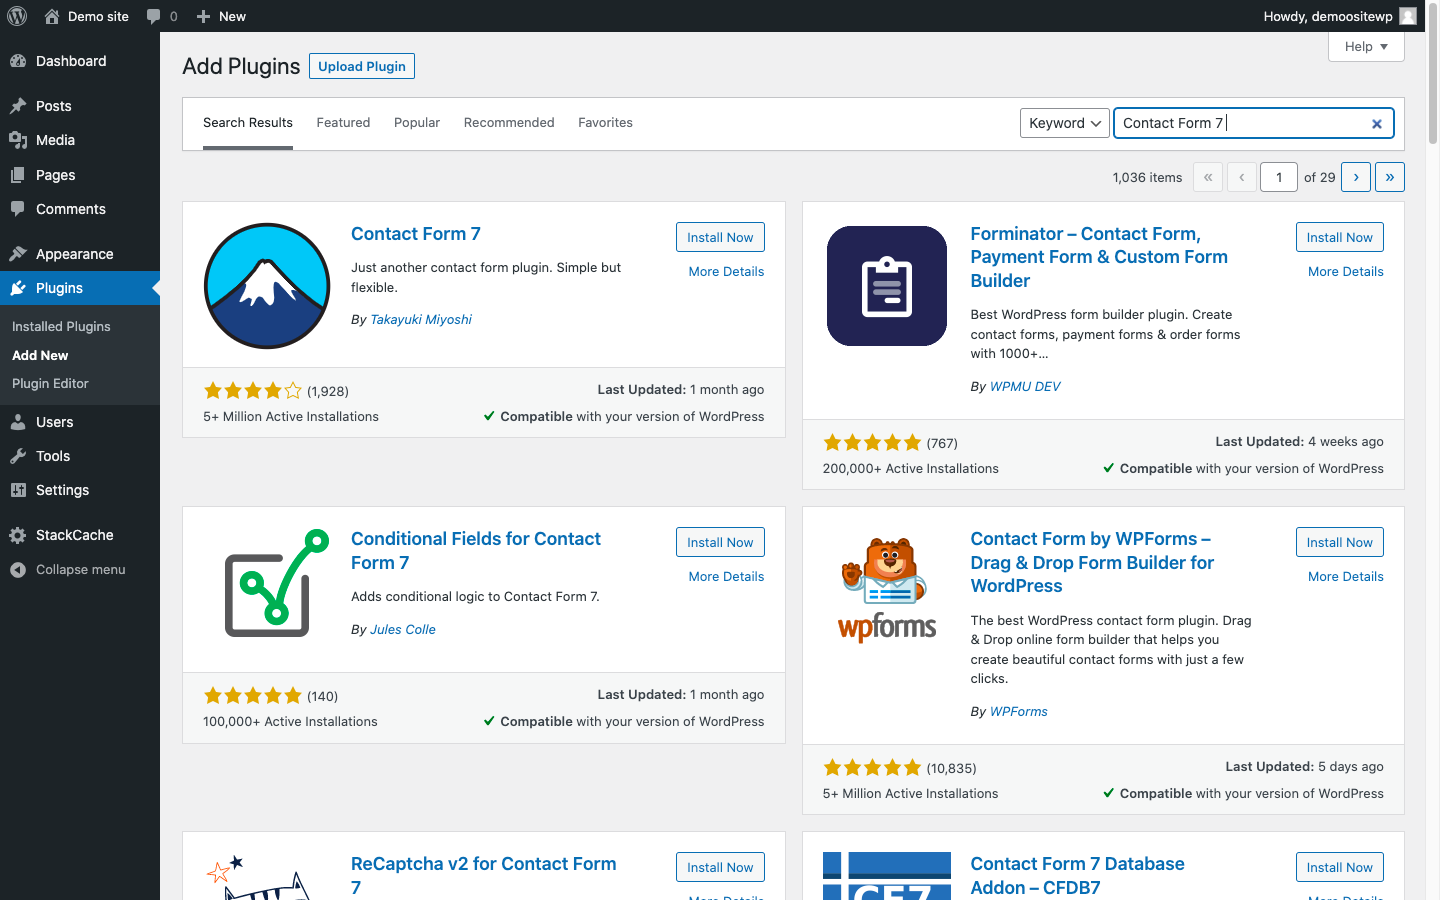
1. Install the Contact Form 7 Plugin
Log in to your WordPress Admin area and head to Plugins and select Add New. Search for Contact Form 7 and select Install Now and then Activate.
2. Add a New Contact Form
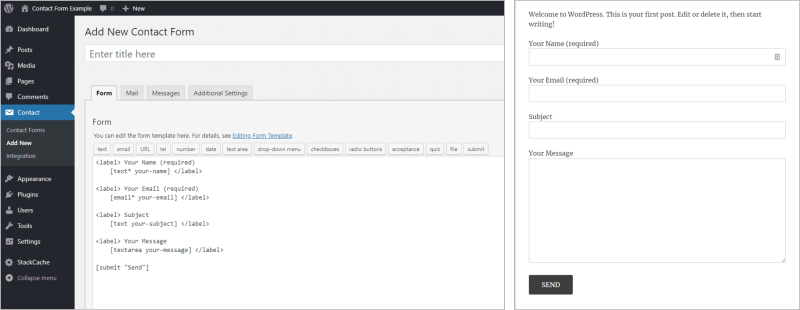
You’ll now see a new menu option called Contact down the left-hand WordPress sidebar. Select Contact to configure a new form. You’ll see a list of current contact forms, with a default form called 'Contact form 1' having already been added.
We’ll create a new one. Select Add New. You'll see the default form that's been added along with its default data. This will display a form that looks like this:
3. Configuring Your Form
Form tags are used as placeholders for a HTML form control. For example, you can add a drop-down menu using the drop-down menu tag. You can see our example below and how it effects the form on the site.
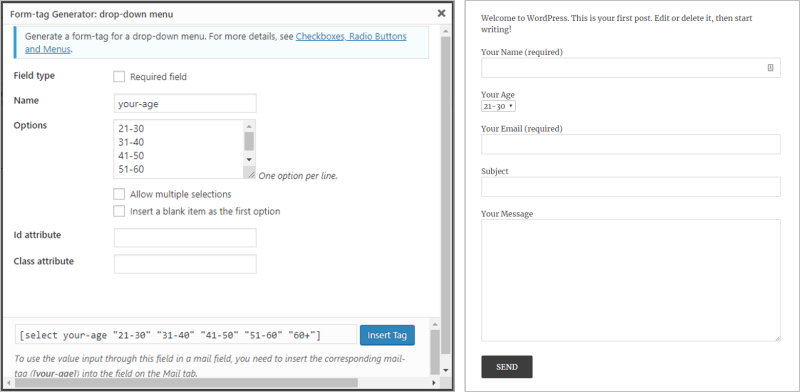
- Field type - This sets whether the field being added is required in order to submit the form.
- Name - This is the name of the form tag being added. It's only used internally so it won't affect how the form field is displayed on the website.
- Options - As this is a drop-down menu tag, there needs to be various options for the user to select. In our example we've used various ages.
- Id attribute/Class attribute - If you want to customise your form further, you can assign a CSS ID or Class attribute.
4. Edit the Mail Settings
Now you've configured your form, you'll want to configure where the form actually sends from, and where it sends to. The From address will always need to be an address that uses your own domain, e.g. [email protected], however you can set the To address to be any email address you want to receive the form to.
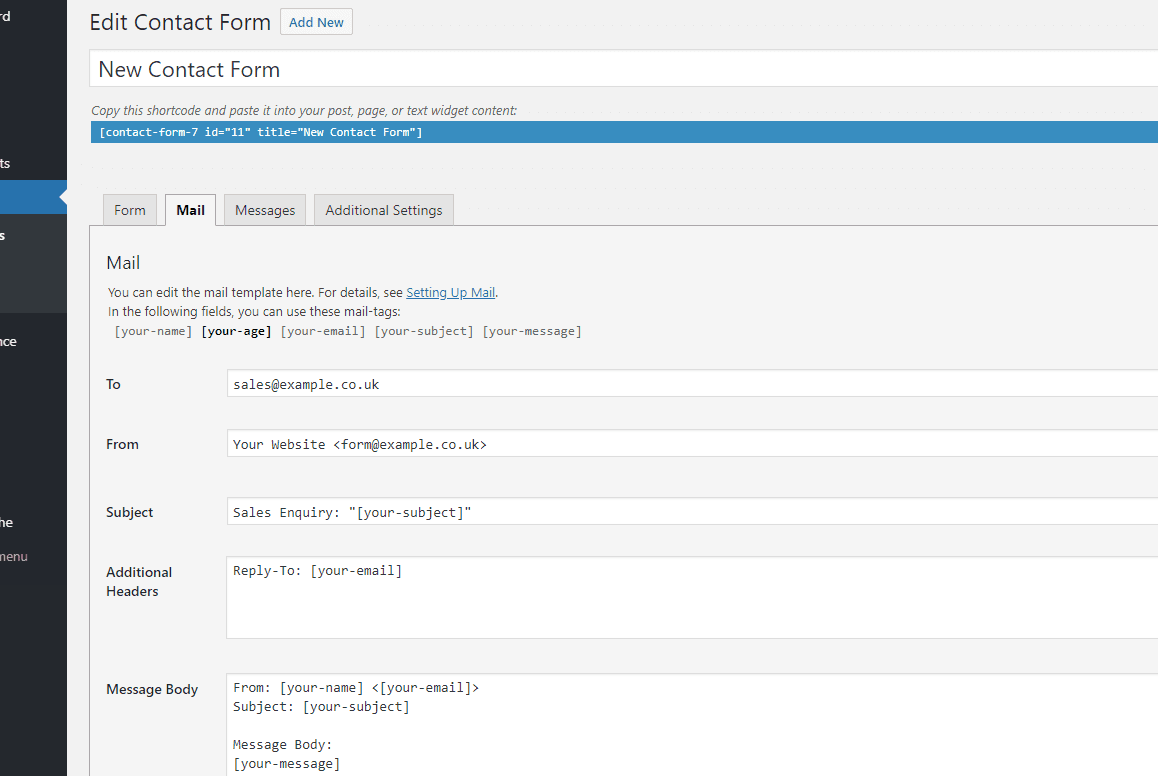
You'll be able to configure what information from the form gets sent via the email, in the example above, you can see the tags: [your-name], [your-email], [your-subject] and [your-message]. This will be the information the form user has entered into the form when they submitted it.
5. Adding the Form To Your Site
Now you've configured the form, you can add it to a Post or Page on your WordPress site. To do this, you'll need the form shortcode which is provided on the Contact Form page.
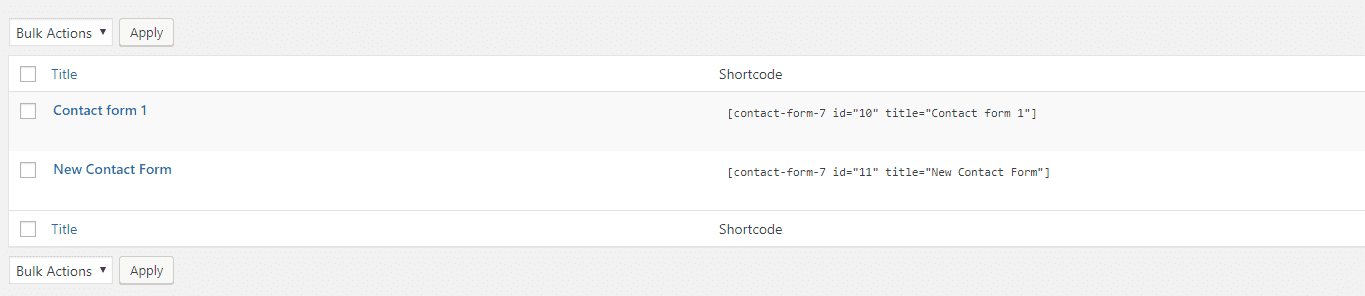
In our example, our short code is:
Add the shortcode to your page as below:
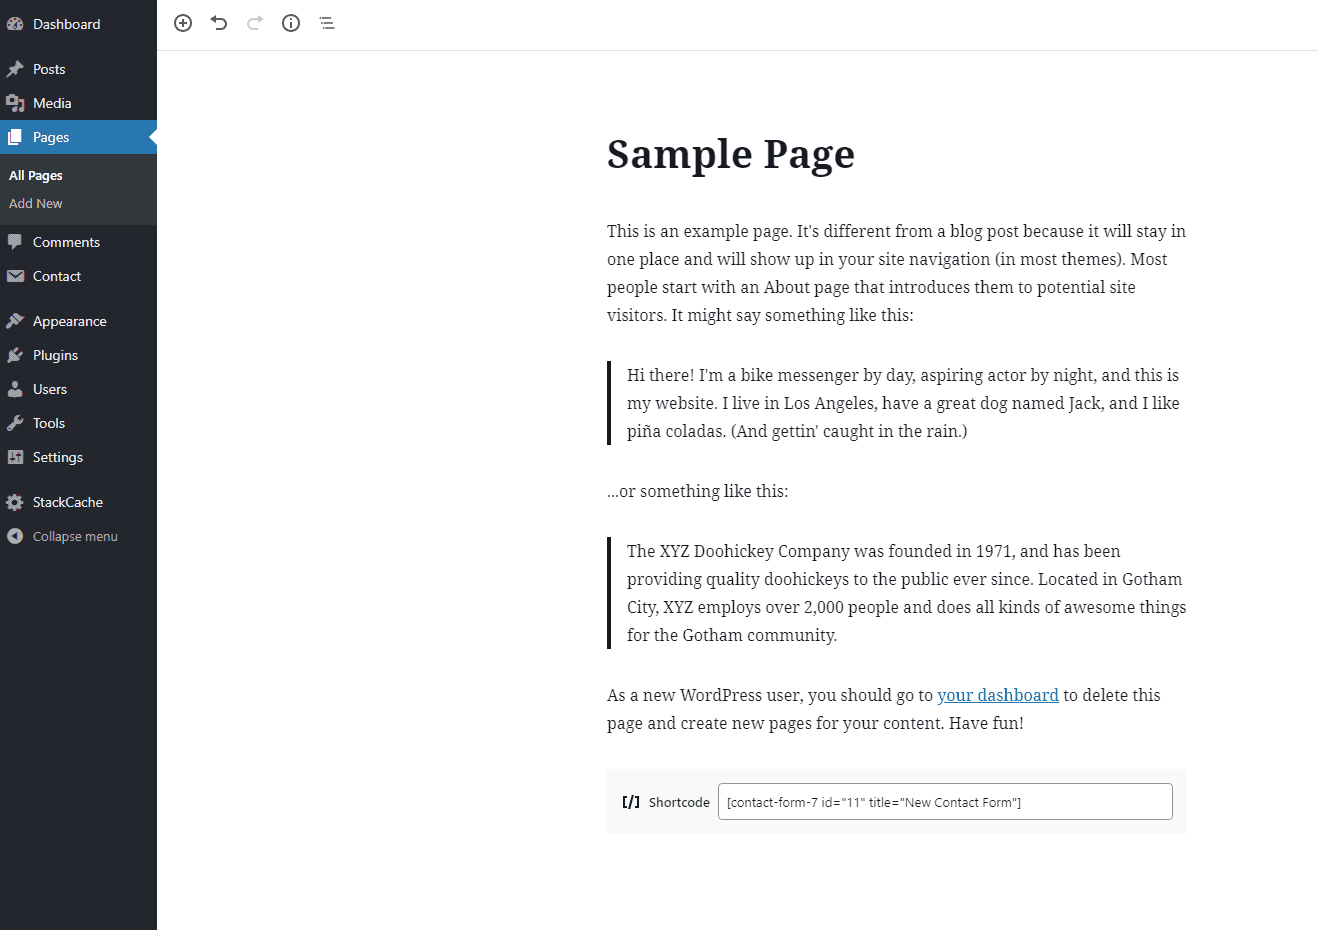
Once done, your form will display on the page or post you've added it-to.
